
Showing posts with label holidays. Show all posts
Showing posts with label holidays. Show all posts
Tuesday, February 14, 2012
While chopping fennel for tonight's soup, I remembered that I wanted to say...
...Happy Valentine's Day!

Tuesday, November 8, 2011
Christmas Gift Idea--Fairy Babies
This is another one from last year. Anastasia made (with a bit of help from me) these Christmas Fairy Babies for her aunts and uncles last year.
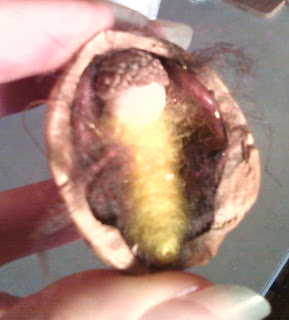 You probably can't see that we included a gold string, so they could be used as ornaments if that was the wish of the recipient. J split walnut shells in half along the seam (please do not use a butter knife for this task... it just may slip, slice your finger rather painfully, and require the use of many bandaids as well as assuring your concerned child that you will eventually be okay). We sanded the edges of those that needed a little smoothing. We placed the gold string in the shell with a dab of tacky glue, then added some fluffed up (that's a technical term) wool yarn to be the baby's bed. As that is drying, you can make your baby.
Take a bit of pipe cleaner and wrap it all but a tiny bit with colored (or not) wool roving. This is one of the tasks that your young child can feel successful with completing. Glue a wooden bead on the unwrapped bit--this will be the baby's head. Glue a small acorn to the head to be the baby's hat (See! It's a good thing I told you about this now. You still have plenty of time to go out and collect acorn caps!). I clipped apart silk flowers to use as the baby's wings and we glued them on to the baby's back.
After everything is dry, snuggle the baby in her shell bed. We did not glue the babies in, in case the recipient wanted to take it out and hold it--they are so cute, it's hard not to hold them!
Enjoy this one. Another present done!
Tuesday, November 1, 2011
Christmas Gift Idea--Candle Wrap
It's beginning to look a lot like...Christmas! I know Halloween just happened, but this is what the stores would like you to believe, right? Well, they have a point. It wouldn't hurt to start thinking about it and get a few things tucked away, so you are not nutso in a month. I'll give you a couple of ideas to get you started. Here is a candle that Anastasia wrapped as her gift for her grandparents last year. She also made smaller versions for her teachers.
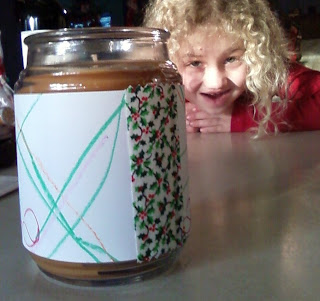 You can get the glass candles for very little money at a number of different stores (hint: shop the day after Christmas and stock up for gifts for next year!). Have your little one choose a piece of scrapbook paper. Measure and cut it to fit the candle. Ask your little one to color (making sure to include her name somewhere, if she is able) the white side of the paper. Use tacky glue to glue the ends of the paper to the candle. These candles were a little too large for the paper to wrap all the way around, which is why there is a strip of ribbon covering that blank spot. Let it dry.
You have a gift finished and ready to give. Good for you!

You have a gift finished and ready to give. Good for you!
Sunday, May 15, 2011
A Mother's Day Gift
My little lovely made me a gift at school in the same fashion I tried this craft last year. It was supposed to be a scarf, but when the "scarves" arrived to her teacher, they were much smaller than anticipated (hankie size). Still, my neck is small enough that I managed to wear the gift as intended and please my little girl (though, she did give me permission to "blow my snot in it and stick it in my pocket").
 I also wanted to show you one of the first cherries that has come off the tree we planted last year--yum! Not enough to do more than munching this year, but I'm hoping to have some cherry canning on my "to do" list next summer. Pitting them doesn't sound too fun though...
Back to the topic of scarves for a moment, I gave one away last year during Sew Mama Sew's Giveaway Day. It's coming up again, really soon, and I am wishing to join in the fun again. What to give away? Any suggestions, based on what I've made in the past?... Requests?... Hopefully, this week won't whisk me away and I forget the Friday deadline. Let's see...

Back to the topic of scarves for a moment, I gave one away last year during Sew Mama Sew's Giveaway Day. It's coming up again, really soon, and I am wishing to join in the fun again. What to give away? Any suggestions, based on what I've made in the past?... Requests?... Hopefully, this week won't whisk me away and I forget the Friday deadline. Let's see...
Monday, April 18, 2011
Read this book: The Country Bunny
In the spirit of Easter and all that is good in the world, please read this book!
I read this to my kindergarten students last week and they were mesmerized by the beautiful story. I suspect the Easter Bunny will be delivering a copy to our house this year...
It is amazing to me that this story of a strong mama bunny--who proves she can do things just as well as (even better than!) the male Jack rabbits--was written in 1939!
Good stuff. Check it out and let me know what you think.
Saturday, April 16, 2011
Wool Eggs... Hatched!

Oh, my! The egg started cracking about a week ago. And, then...

Tuesday, April 5, 2011
Wool Eggs
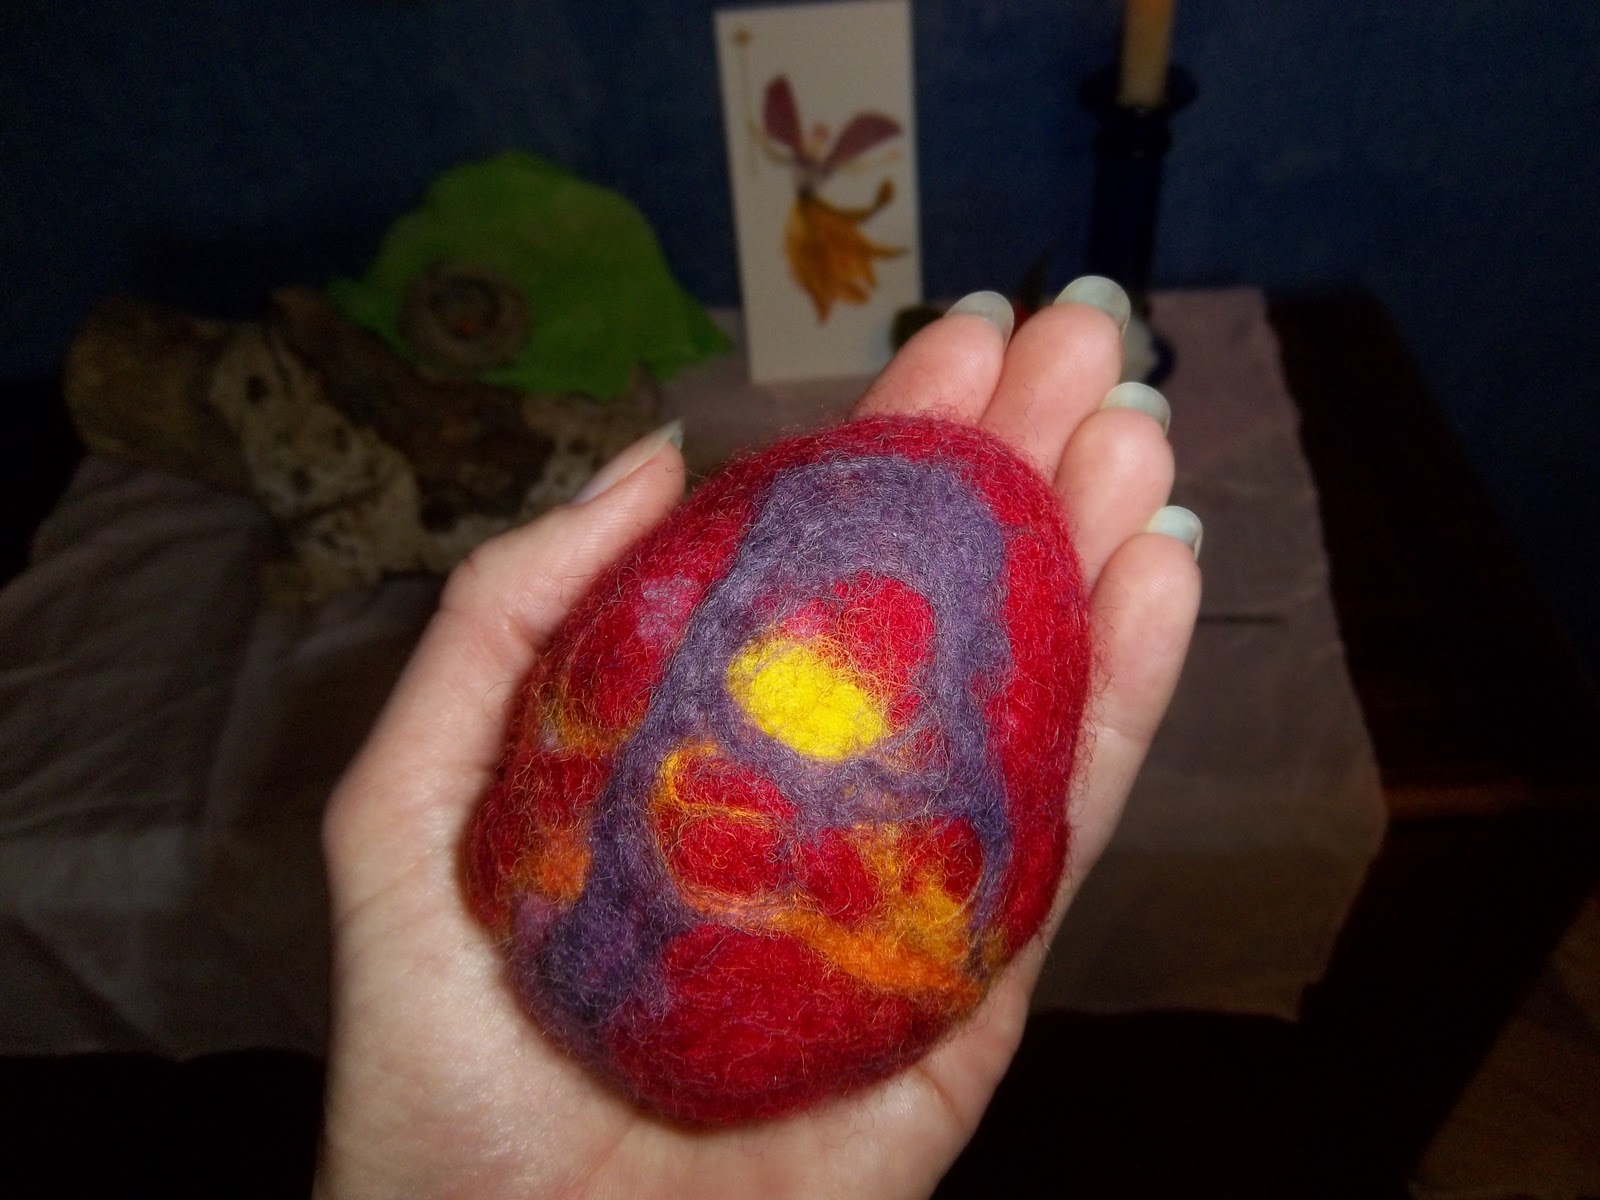
Don't know how to wet-felt? Just ask, and I will do my best to explain here. The supplies and procedure are quite simple.
They are cute just like this, but you can modify them a bit... Check back in a week or so to see what this one has morphed into!
Tuesday, December 28, 2010
Sew What?!! Holiday Challenge: An ornament for the tree
This is the last challenge. Maybe I will think twice before I commit to another thing that sounds really fun but I don't actually have the time for... well, maybe I will. Stranger things have happened, I'm sure. Plus, Jason has requested that I please learn how to say "no", so I really ought to try. Sounds like I have my first resolution for the new year!

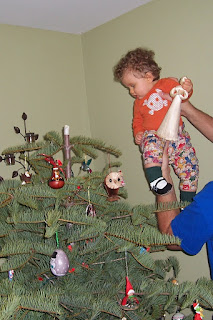
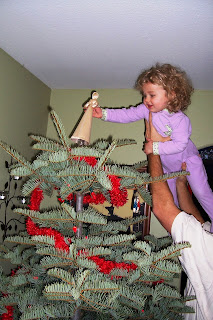
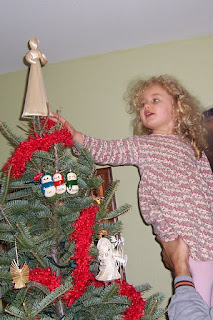


The final challenge was an ornament for the tree. Is the angel considered an ornament? I'm going to say "yes" and have my sweet little angel count. She is a cornhusk angel that I bought, I don't know where, and knitted a skirt for her that matches our garland. She's cute. And the little angel who places her on top of the tree every year is cute, too!


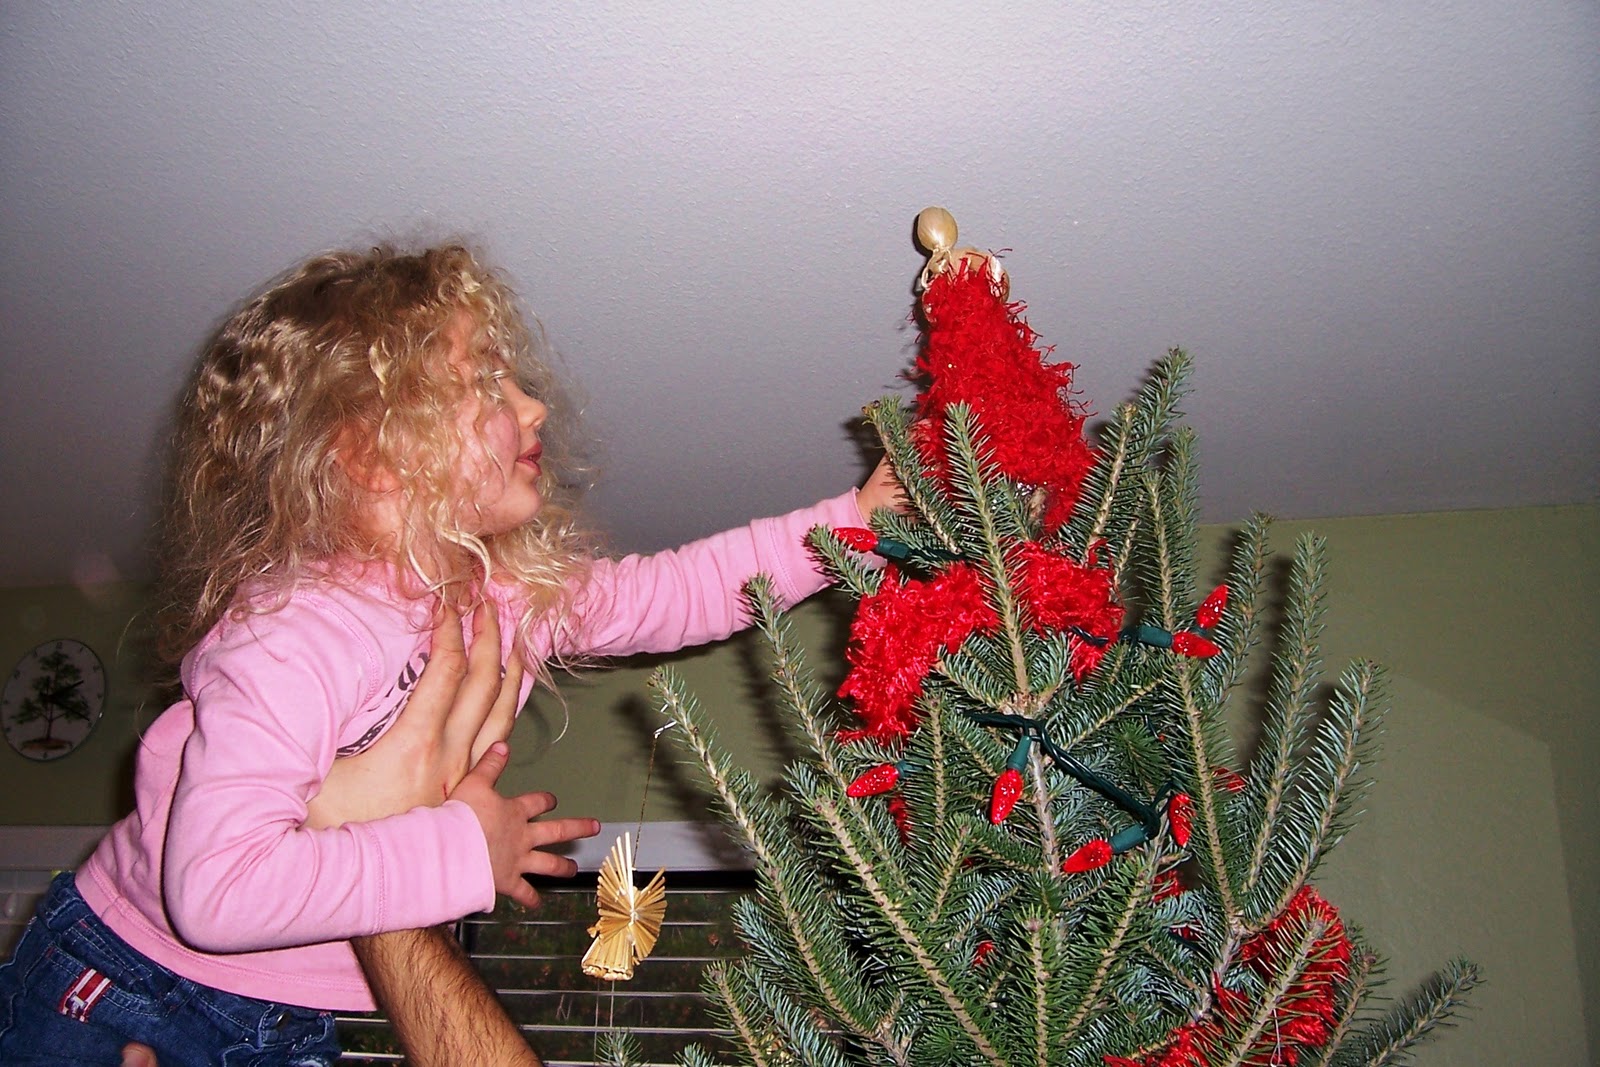
This year's photo is on the camcorder, and I'm not sure how to get it out of there....! It is safe for you to just assume it is an equally cute photograph. ;-)
Monday, December 27, 2010
Sew What?!! Holiday Edition: Stockings
So, this was the week three Sew What?!! Holiday Edition challenge, way back in October... Again, I didn't actually make these this year (it still counts, right?!).... I made them four years ago for Anastasia's first Christmas.
 Not sure who made the pattern, but I know where to find it in my pile of yarn. If you're interested, just let me know. They weren't too tricky to knit. I did knit one for myself, too, it is hanging on the other side of this walkway. For our names, I crocheted a long chain and then used it to "write" our names, stitching to the stocking in strategic places.
You may remember, I actually completed and posted week two's challenge, a holiday outift, on time. Wow! You can check it out here.

You may remember, I actually completed and posted week two's challenge, a holiday outift, on time. Wow! You can check it out here.
Sunday, December 26, 2010
Sew What?!! Holiday Edition--Trying to redeem myself with an oat bag.
Oat bag.... I get my oat bag now. Oat bag time for me!
If you have ever listened to a Seinfeld cd, perhaps this quote is a familiar one to you. If not, just laugh along with me for a moment. After all, laughing is good for your health. Speaking of health, J eats oatmeal for lunch EVERY DAY. I would go nuts, but this is his thing. It started when he got a report of high cholesterol and continued after he lowered it due, in part, to an oatmeal-for-lunch-every-day diet. So, the diet continues.
Though I am waaaay behind on this (I think it happened in October), I committed to participate in The Sewing Dork and Until Wednesday Calls' Sew What?!! Holiday Challenge. I hate to fail. I think most people probably do, too, but I have this perfectionist quality that makes me physically ill if I do not complete something to my expectations. Perhaps that is why I have a cold now that Christmas is over... At any rate, I committed to the challenge and I will complete it! So, going back to these ladies' blogs to see what the challenges were.... I found that week one's Sew What?!! theme was "a gift for him". I couldn't think of anything else to sew, so I made this bag for J to store his oatmeal packets at work. He will likely be the only one who ever sees it, but I think it will give him a chuckle. And, that's a nice thing in the middle of your work day.

 I thought the little horsey applique on the back was a nice touch. ;-)
A Bonus Craft for the Challenge was a garland. Now, clearly I did not have time to do that this year. But, I did knit the garland for our tree a few years ago. It's really easy, folks--huge needles, fuzzy yarn, cast on a few stitches and keep going until you run out of yarn....
 Hope you had a lovely holiday, too.
If you have ever listened to a Seinfeld cd, perhaps this quote is a familiar one to you. If not, just laugh along with me for a moment. After all, laughing is good for your health. Speaking of health, J eats oatmeal for lunch EVERY DAY. I would go nuts, but this is his thing. It started when he got a report of high cholesterol and continued after he lowered it due, in part, to an oatmeal-for-lunch-every-day diet. So, the diet continues.
Though I am waaaay behind on this (I think it happened in October), I committed to participate in The Sewing Dork and Until Wednesday Calls' Sew What?!! Holiday Challenge. I hate to fail. I think most people probably do, too, but I have this perfectionist quality that makes me physically ill if I do not complete something to my expectations. Perhaps that is why I have a cold now that Christmas is over... At any rate, I committed to the challenge and I will complete it! So, going back to these ladies' blogs to see what the challenges were.... I found that week one's Sew What?!! theme was "a gift for him". I couldn't think of anything else to sew, so I made this bag for J to store his oatmeal packets at work. He will likely be the only one who ever sees it, but I think it will give him a chuckle. And, that's a nice thing in the middle of your work day.


A Bonus Craft for the Challenge was a garland. Now, clearly I did not have time to do that this year. But, I did knit the garland for our tree a few years ago. It's really easy, folks--huge needles, fuzzy yarn, cast on a few stitches and keep going until you run out of yarn....

Saturday, December 18, 2010
Let's Get Ready for Christmas: A Wreath and A Giveaway Winner
My winter break officially began at 11:00 yesterday when the kids were dismissed (well, really at 1:00 when I was driving home). Now, I can focus on this business of Christmas!
First, the winner of the mama and baby duck giveaway is #26, sandyandcosmo... Congratulations!
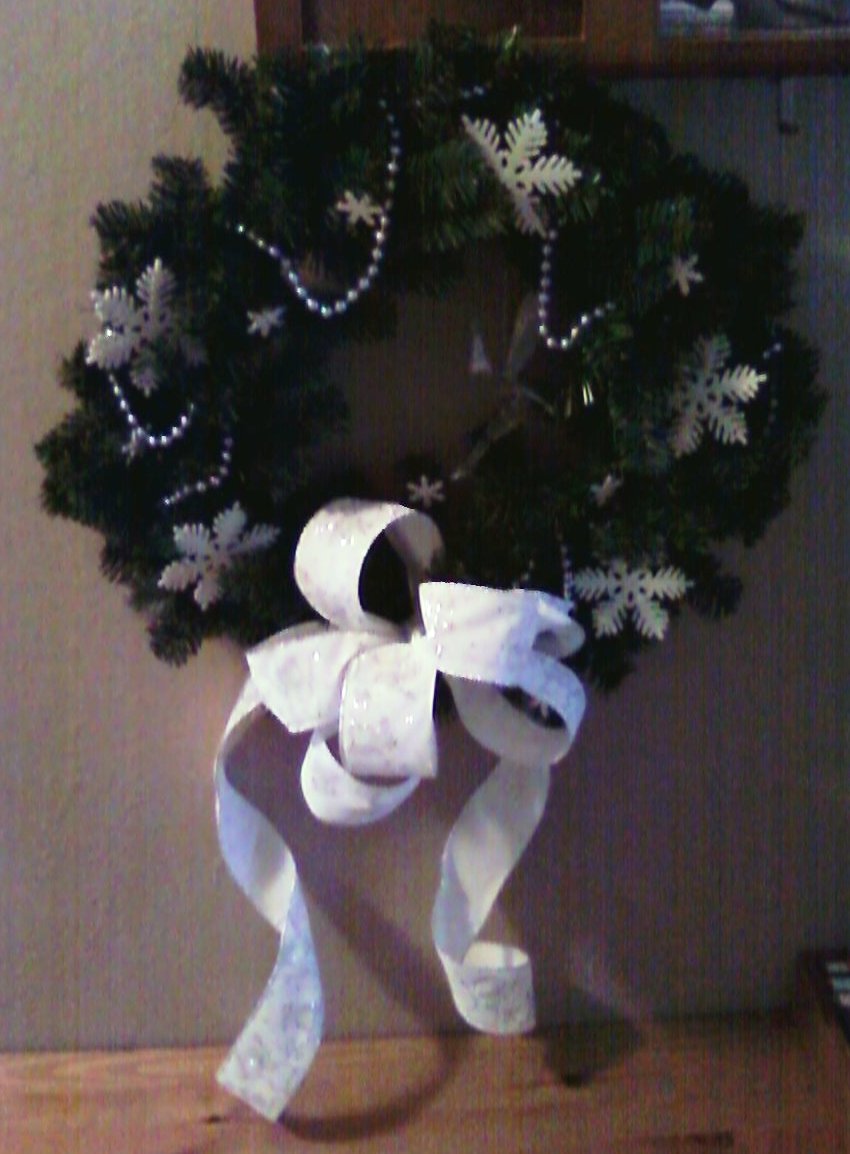
Secondly, I wanted to share with you a wreath that I helped my mom make for a contest at work. We did not win, but I think it's pretty cute for having only taken 10 minutes to make and using only things that I had laying around in my craft room. Though, I do apologize for the crappy picture. I've been using my camera as a phone for months, so I have no flash. You can barely see the ice fairy swinging in the middle...
 I still need to make a wreath for my own front door but, like I said, I now have time to focus on the business of Christmas. So, it will come soon!
First, the winner of the mama and baby duck giveaway is #26, sandyandcosmo... Congratulations!
Secondly, I wanted to share with you a wreath that I helped my mom make for a contest at work. We did not win, but I think it's pretty cute for having only taken 10 minutes to make and using only things that I had laying around in my craft room. Though, I do apologize for the crappy picture. I've been using my camera as a phone for months, so I have no flash. You can barely see the ice fairy swinging in the middle...
Wednesday, December 1, 2010
Advent
My sister called last night and was needing to come up with a quick Advent calendar idea, which reminded me that I was also needing to do that. The Sewing Dork had posted her idea a couple of days ago and I was wishing to borrow it. So, I did.
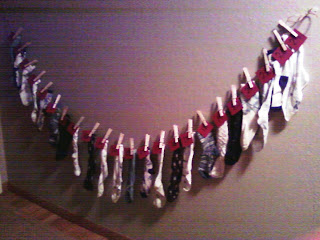
Thank you, Cynthia, for the wonderful idea that is cute and easy enough to complete at the eleventh hour!

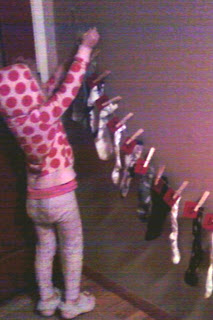
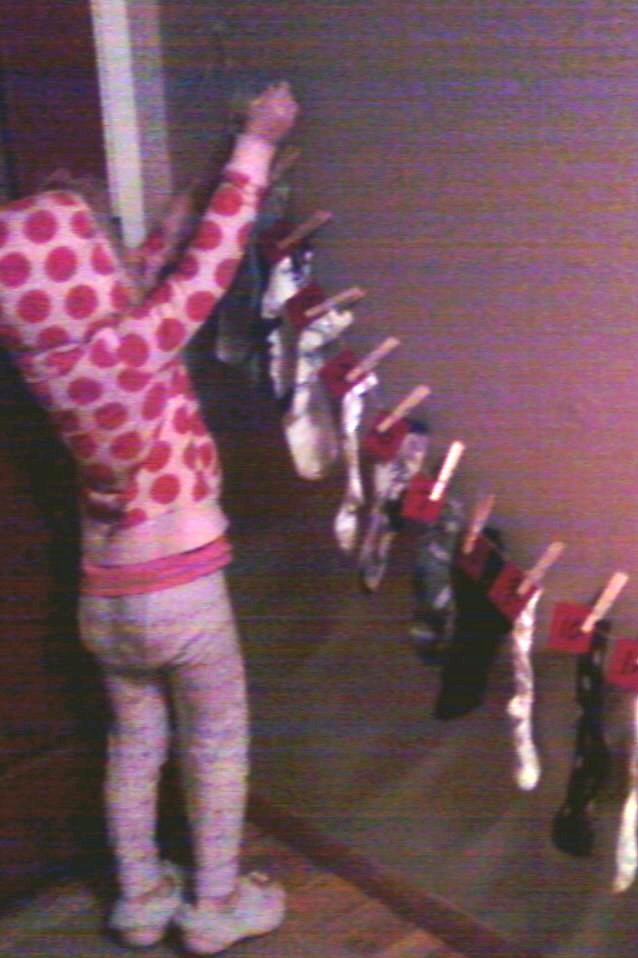
I think her version with kid socks is cuter than my version with me-sized socks, but it still fits the bill. I asked Anastasia to take down the first sock this morning and she was delighted when she realised there was a gift, "Mom! There are stickers in the sock!" I have a feeling there will be more stickers tomorrow...
Wednesday, November 24, 2010
Sooooo thankful!
The other night, J handed me a piece of paper he'd found in a box in the closet. It was the discharge papers from when Little Miss was in the NICU after she was born. It was hard to read (I actually don't remember ever reading it, though I know I must have), as it instantly took my mind and heart back to reliving those nightmarish two weeks. You would never know that my big girl was born a preemie! I am so grateful for the care she received in the NICU (those nurses are angels) and for her helping me to realise that she is one tough cookie who is just determined to be in control as much as she can. Hmm... I wonder where she gets that from. ;-)
Thank YOU for reading through that little bit of mush--the icing on the cake is this lovely view outside my dining room window:
 Happy Thanksgiving!
Thank YOU for reading through that little bit of mush--the icing on the cake is this lovely view outside my dining room window:

Saturday, October 30, 2010
Halloween Fun
I once again used the bean bag board that was painted for two different birthdays: strawberry brownie and gingerbread. This time, it is being used at my uncle's 60th party, which we are celebrating today on this Halloween weekend. So, I went with a skull theme...
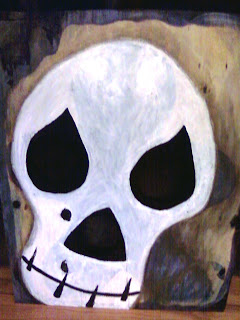 The holes for the beanbags are in the eyes and nose. I made lavender and flax filled bean bags with a skull fabric scrap I had on hand. I used this fabric on one side and different colored fabrics for the second side of the bag, so each child at the party can know which bean bag is theirs when it is time to take one home.
I hope I don't have to explain that the skull is in reference to Halloween and not the fact that he's turning 60... I'm not that dark, and he's not that old!

I hope I don't have to explain that the skull is in reference to Halloween and not the fact that he's turning 60... I'm not that dark, and he's not that old!
Saturday, October 2, 2010
Decoration Opinion--Crows?...Ravens?
I'm sorry I haven't been blogging as much, if anyone noticed, but I am having a bit of a difficult time adjusting to working 5 days/week instead of the 2 or 3 I had been accustomed to since Miss A was born. Additionally, kindergarten seems a lot more difficult than fifth grade, which seems like an odd thing to say.... But, the thing is, these children are learning how to be in a room with 22 other little people who also want my undivided attention, so there is a lot of adjustment for them, too. So, it's challenging in a way that I've not been challenged before. Plus, it's my first year with a kindergarten curriculum, which means I am spending a lot of my "free" time developing circles, learning songs, and things like that, rather than spending time on the computer. At first, I thought, Okay, this will just be tricky for the first year, next year I will have it down and be able to think a little more about my non-work life when I am away from school. But, then I remembered that many of our children stay with us for two years (remember, this is a waldorf-inspired school), so next year we will tell different stories, do different crafts, and lead different circles and I will be spending time learning all the new things again. At least I should have our daily/weekly rhythm down by then!... Long story short, I've been wanting to craft and sew and blog, but the time just hasn't been there. Kindergarteners take a lot more energy, too, so I can't stay up late like I used to and still have enough energy the next day. This is proving to be helpful in sticking to one of my New Year's Resolutions that had fallen by the wayside.
But, you thought I needed your opinion in this post, so why are you reading about my job? (Are you still reading?!!) Well, that was just a side-note, because it was on my mind and I wanted to thank you if you are in fact still reading this blog. Yes, I am looking for your help. Here's the deal:
We have a murder of crows (I love that!) that roost in our neighborhood. I love the fact that they are so intelligent; it freaks J out a bit. I also am a big fan of ravens. We don't have any around here, but I fondly remember the ravens from the Tower of London. So cool... Anyhow, it's getting near Halloween (in case you didn't already realize that) and I would like to step up my decorations a bit. In honor of the neighboring birds, I've decided I would like a crow/raven theme. So far, I have a bale of hay on the front porch, which has nothing to do with ravens, but it's all I've been able to do that had something of an autumn theme.
What else should I do? What should I make? (Remember the start of this post when I told you I don't have as much time on my hands as I would like...) Have you seen anything in a store, on a blog, or have you crafted something yourself that might work with my theme? Please share it here! I will do my best to follow some/all suggestions and post about it here in a timely manner.
Thank you in advance for your help, and thank you for reading this blog (though the posts are now few and far between). With gratitude!
Monday, July 5, 2010
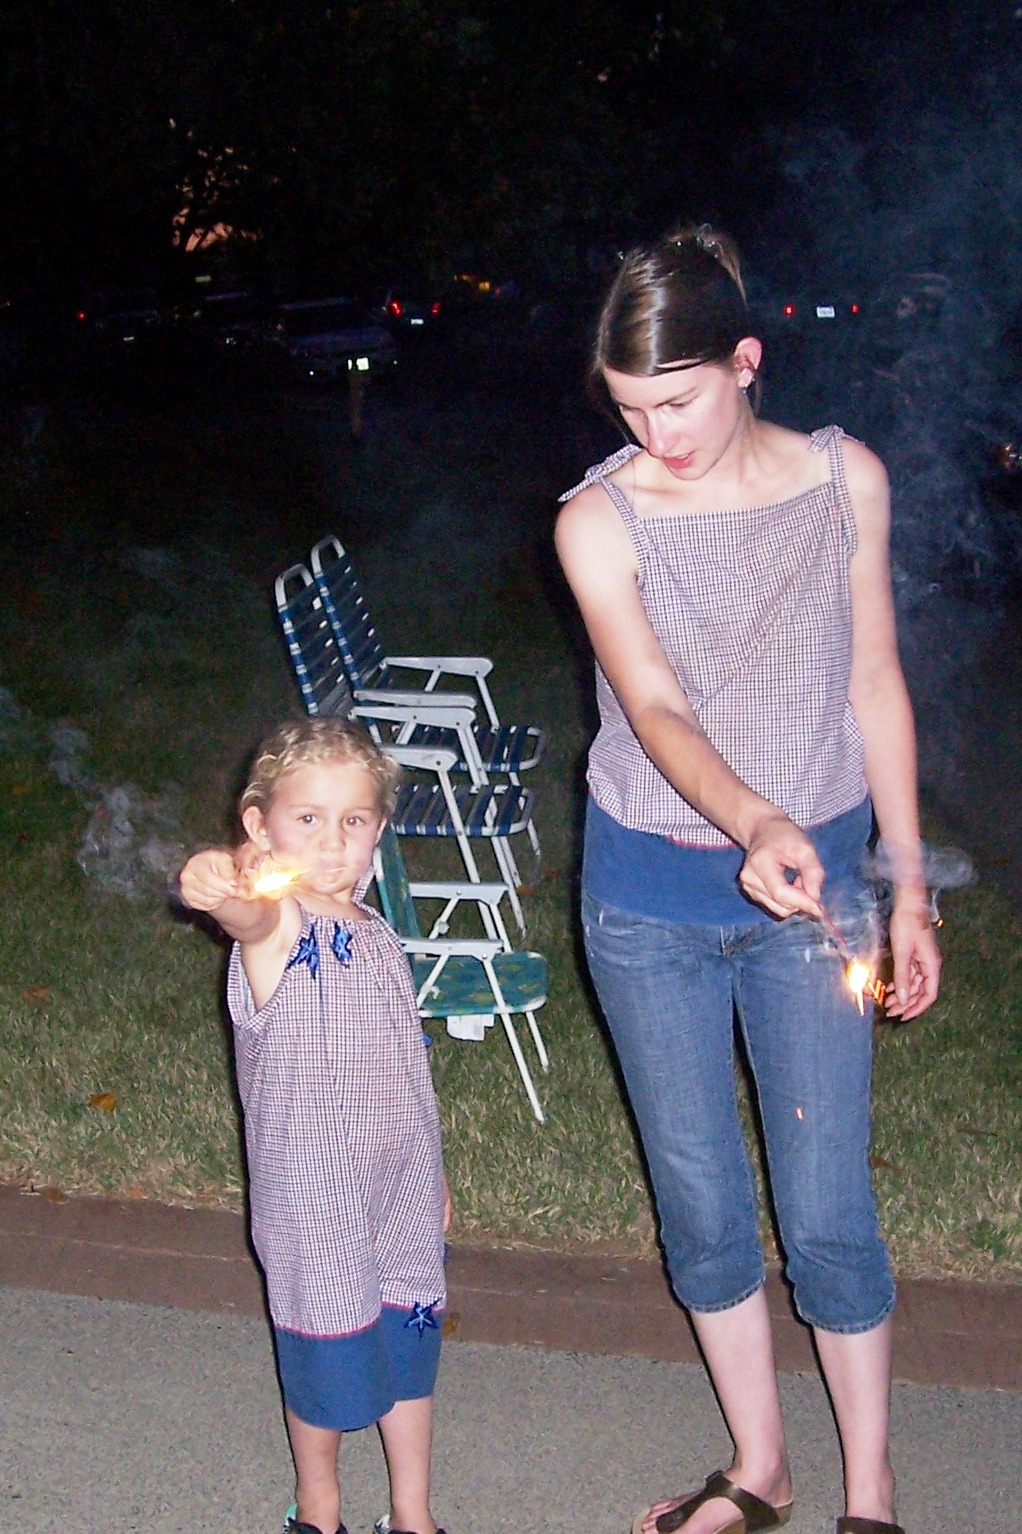
Independence Day (and Giveaway Winner!)
Hope those of you who were celebrating the 4th of July enjoyed yourselves. We did (in our matching pillowcase refashions).
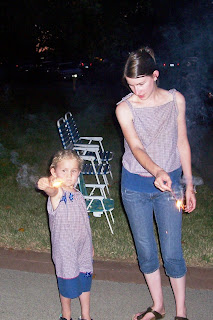
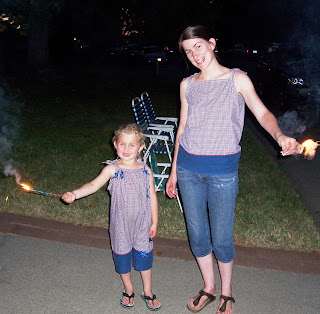 Little Miss's embellishments are blue satin stars. I think I will practice shirring on the front of my blouse. After I put it on (and it was too late to make any changes), I thought that it could use a bit more form.
On another note... Random.org decided that commenter #1 is the winner of my giveaway, so... Congratulations, Needled Mom!

On another note... Random.org decided that commenter #1 is the winner of my giveaway, so... Congratulations, Needled Mom!
Tuesday, May 11, 2010
Mother's Day Scarves
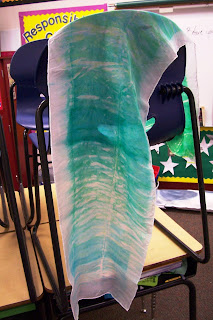
After visiting a couple kindergarten classrooms and watching them dye scarves for their mothers, I thought my fifth graders probably could use some help with Mother's Day gifts, too. So, I ordered scarves from Dharma Trading Co. (love them!), raided our classroom supply cabinets for bleeding tissue paper, and helped my kids out a bit.
Sure, it took me an entire day to iron 31 scarves. But, it was totally worth it. The kids loved to see each others' creative color combinations as I unrolled each scarf for ironing, and I think their moms loved receiving such unique gifts that they were likely not expecting!
I do not have a thorough tutorial for this craft, as it requires the use of bleeding tissue paper..... which, bleeds.... all over your counter and hands, and you need both hands to quickly fold/roll and clean up! Not much extra time for picture taking, so I hope my words will suffice for the first part of the tutorial and I will finish with photos.
For this project, you will need: a silk scarf, bleeding tissue paper (cut or torn to a size smaller than the width of your scarf), lemon juice and water (50/50) in a spray bottle, a safe place for the full of dye scarf to rest for a day (like an old plastic container or packaging of some sort), and an iron.
Lay your scarf out on a counter or other surface that you won't freak out if it gets a bit of color on it that won't clean off. I suppose waxed paper on your counter would work just fine.
Set your tissue paper pieces on your scarf, with the first piece/color being very close to the edge that you will start folding/rolling from. I used four rectangular pieces of tissue, two pieces each of two colors.
I then folded my scarf from my starting edge, spraying with the lemon juice mixture as I continued to fold. My students rolled their scarves, rather than folding them, and I really like the way they turned out. The color is more fluid and spots have a tie dyed effect that I enjoy. But, both methods are cool. You want the scarf to be wet, as this is how the tissue will transfer its color to the scarf. The lemon juice's acidity helps to set the color as well. Continue folding and spraying until you've reached the end of your scarf. Fold it some more if you need, and set it in your "safe place".
Leave it alone for a full day. Try to keep it out of the sun, as you don't want it to dry out. Spray with more lemon juice mixture if you need to.
After a full day, unfold your scarf and remove the tissue.
Set your iron to the silk setting and get to ironing! This will set the color and dry out your scarf. If it is still too wet, I would recommend using a pressing cloth for a while first, then iron over the whole scarf without it.

Voila!
 (folded method)
 (rolled method)
A simple piece of yarn is all you need to wrap your gift.
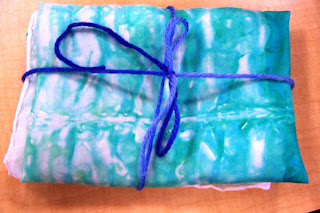 (rolled method)

Also, this post is linked up @


Sure, it took me an entire day to iron 31 scarves. But, it was totally worth it. The kids loved to see each others' creative color combinations as I unrolled each scarf for ironing, and I think their moms loved receiving such unique gifts that they were likely not expecting!
I do not have a thorough tutorial for this craft, as it requires the use of bleeding tissue paper..... which, bleeds.... all over your counter and hands, and you need both hands to quickly fold/roll and clean up! Not much extra time for picture taking, so I hope my words will suffice for the first part of the tutorial and I will finish with photos.
For this project, you will need: a silk scarf, bleeding tissue paper (cut or torn to a size smaller than the width of your scarf), lemon juice and water (50/50) in a spray bottle, a safe place for the full of dye scarf to rest for a day (like an old plastic container or packaging of some sort), and an iron.
Lay your scarf out on a counter or other surface that you won't freak out if it gets a bit of color on it that won't clean off. I suppose waxed paper on your counter would work just fine.
Set your tissue paper pieces on your scarf, with the first piece/color being very close to the edge that you will start folding/rolling from. I used four rectangular pieces of tissue, two pieces each of two colors.
I then folded my scarf from my starting edge, spraying with the lemon juice mixture as I continued to fold. My students rolled their scarves, rather than folding them, and I really like the way they turned out. The color is more fluid and spots have a tie dyed effect that I enjoy. But, both methods are cool. You want the scarf to be wet, as this is how the tissue will transfer its color to the scarf. The lemon juice's acidity helps to set the color as well. Continue folding and spraying until you've reached the end of your scarf. Fold it some more if you need, and set it in your "safe place".
Leave it alone for a full day. Try to keep it out of the sun, as you don't want it to dry out. Spray with more lemon juice mixture if you need to.
After a full day, unfold your scarf and remove the tissue.

Set your iron to the silk setting and get to ironing! This will set the color and dry out your scarf. If it is still too wet, I would recommend using a pressing cloth for a while first, then iron over the whole scarf without it.

Voila!
 (folded method)
 (rolled method)
A simple piece of yarn is all you need to wrap your gift.
 (rolled method)
Please come on back to visit on Monday,
as I will be participating in
Also, this post is linked up @
Thursday, April 29, 2010
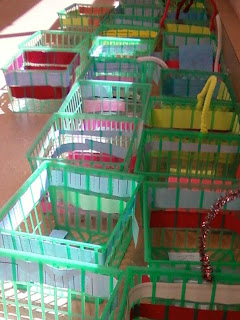
May Day Baskets--All Finished and Filled!
Last week, I started my students on a May Day basket project. Today we finished our baskets and filled them with paper flowers.

Cute, huh?!
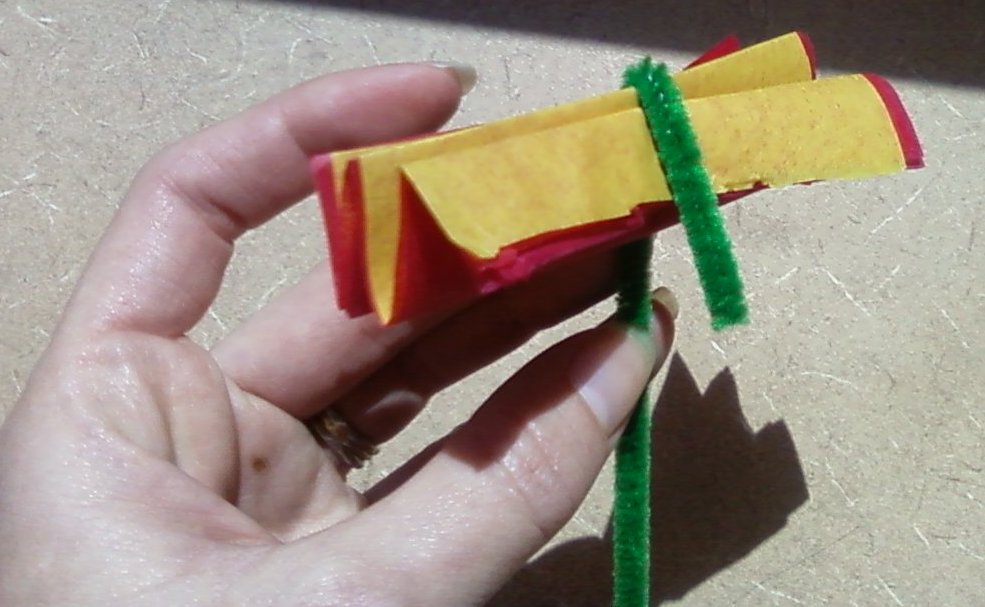
To make the flowers is simple. If you ever helped make a float for high school homecoming, 4th of July parade, or something like that, do what you did then. If you never did any of those things, do this:
Take 4 squares of tissue paper.
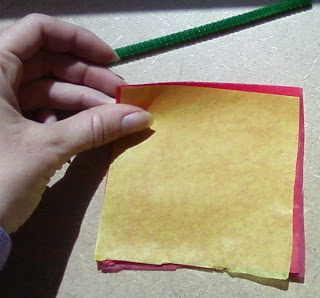 The squares can be any size, really, but ours were about 4" square. Stack them neatly and fold them accordian-style.

Tie a pipe cleaner in the middle of the paper accordian.
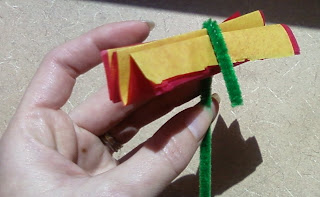
Gently pull each piece of tissue to the center and then fluff to your liking.

See? Easy!
Linked up at:


Cute, huh?!
To make the flowers is simple. If you ever helped make a float for high school homecoming, 4th of July parade, or something like that, do what you did then. If you never did any of those things, do this:
Take 4 squares of tissue paper.


Tie a pipe cleaner in the middle of the paper accordian.
Gently pull each piece of tissue to the center and then fluff to your liking.

See? Easy!
Linked up at:
Thursday, April 22, 2010
Earth Day May Day Baskets
Being the me that I am, I had to figure out something to do with my students to celebrate Earth Day today. My lesson plans for the day quickly evaporated, as one thing led to another (as is often the case). But, I still managed to pull this one off. The project is not finished, as we did not have a long enough chunk of time, but we got to talk about the good Earthy stuff on Earth Day, so I consider it a success in progress.
We started making baskets for May Day.
I've been collecting used strawberry baskets as I use/find them. And, we have a nice cubby filled with scratch paper. So, we reused those two items to begin our May Day basket-making, and had a brief lesson in reuse, as well as doorbell ditching etiquitte. It took me back to 20ish years ago when my sister and I would make May Day baskets, fill them with Spring flowery goodness, ring the bell of an unsuspecting well-loved neighbor, set the basket on the porch, and run... Good stuff.
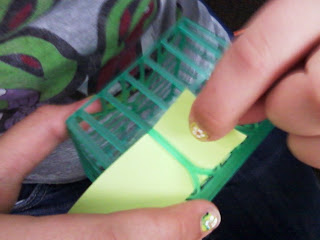
And, you can do it with your kiddos, too. You just need colored paper that has already lived a good, used life (remember, we're talking reuse here), scissors, and a strawberry basket.

Cut strips of paper that will fit through the spaces on the sides of the basket, and weave them in and out.


We started making baskets for May Day.
I've been collecting used strawberry baskets as I use/find them. And, we have a nice cubby filled with scratch paper. So, we reused those two items to begin our May Day basket-making, and had a brief lesson in reuse, as well as doorbell ditching etiquitte. It took me back to 20ish years ago when my sister and I would make May Day baskets, fill them with Spring flowery goodness, ring the bell of an unsuspecting well-loved neighbor, set the basket on the porch, and run... Good stuff.
And, you can do it with your kiddos, too. You just need colored paper that has already lived a good, used life (remember, we're talking reuse here), scissors, and a strawberry basket.
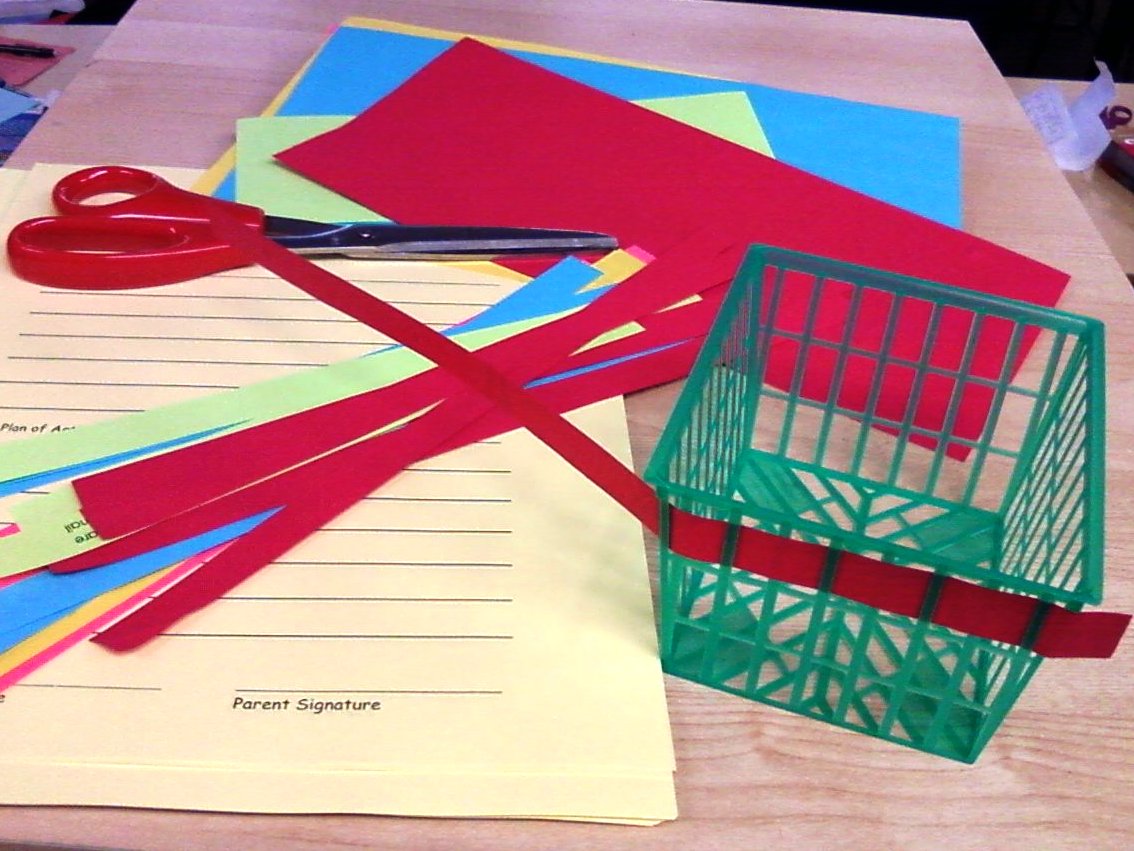
Cut strips of paper that will fit through the spaces on the sides of the basket, and weave them in and out.


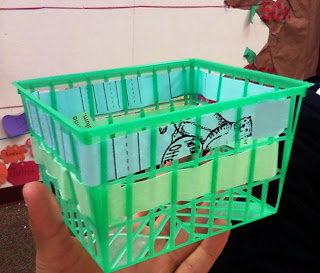
Keep doing this until your basket is completely decorated. I do not have any pictures to show you for this. Not sure if we'll have time to tackle finishing these tomorrow. We'll see. They will be finished by next Thursday, for sure, and I will post the finished product pictures. Here's what is sitting in my classroom right now; come back on Thursday for the finished basket pics!

Sunday, April 4, 2010
The Easter basket is alive!
...well, it's innards are alive. See?
 Anastasia very much enjoyed working alongside me to fill the pink basket for her Grandma and Papa. There is basil in there, which I hope will be happy in the baskets long enough to give some good culinary use.
Want to know how we did it? Head over to my sister's blog to read my guest post tutorial there. Get your basket made for a Spring decoration this year, or bookmark it for an Easter-into-Spring decoration next year.
Inexpensive. Easy. Cute.

Want to know how we did it? Head over to my sister's blog to read my guest post tutorial there. Get your basket made for a Spring decoration this year, or bookmark it for an Easter-into-Spring decoration next year.
Inexpensive. Easy. Cute.
Subscribe to:
Posts (Atom)