This is another one from last year. Anastasia made (with a bit of help from me) these Christmas Fairy Babies for her aunts and uncles last year.
You probably can't see that we included a gold string, so they could be used as ornaments if that was the wish of the recipient. J split walnut shells in half along the seam (please do not use a butter knife for this task... it just may slip, slice your finger rather painfully, and require the use of many bandaids as well as assuring your concerned child that you will eventually be okay). We sanded the edges of those that needed a little smoothing. We placed the gold string in the shell with a dab of tacky glue, then added some fluffed up (that's a technical term) wool yarn to be the baby's bed. As that is drying, you can make your baby.
Take a bit of pipe cleaner and wrap it all but a tiny bit with colored (or not) wool roving. This is one of the tasks that your young child can feel successful with completing. Glue a wooden bead on the unwrapped bit--this will be the baby's head. Glue a small acorn to the head to be the baby's hat (See! It's a good thing I told you about this now. You still have plenty of time to go out and collect acorn caps!). I clipped apart silk flowers to use as the baby's wings and we glued them on to the baby's back.
After everything is dry, snuggle the baby in her shell bed. We did not glue the babies in, in case the recipient wanted to take it out and hold it--they are so cute, it's hard not to hold them!
Enjoy this one. Another present done!
Showing posts with label children's art. Show all posts
Tuesday, November 8, 2011
Tuesday, November 1, 2011
Christmas Gift Idea--Candle Wrap
It's beginning to look a lot like...Christmas! I know Halloween just happened, but this is what the stores would like you to believe, right? Well, they have a point. It wouldn't hurt to start thinking about it and get a few things tucked away, so you are not nutso in a month. I'll give you a couple of ideas to get you started. Here is a candle that Anastasia wrapped as her gift for her grandparents last year. She also made smaller versions for her teachers.
You can get the glass candles for very little money at a number of different stores (hint: shop the day after Christmas and stock up for gifts for next year!). Have your little one choose a piece of scrapbook paper. Measure and cut it to fit the candle. Ask your little one to color (making sure to include her name somewhere, if she is able) the white side of the paper. Use tacky glue to glue the ends of the paper to the candle. These candles were a little too large for the paper to wrap all the way around, which is why there is a strip of ribbon covering that blank spot. Let it dry.
You have a gift finished and ready to give. Good for you!
You can get the glass candles for very little money at a number of different stores (hint: shop the day after Christmas and stock up for gifts for next year!). Have your little one choose a piece of scrapbook paper. Measure and cut it to fit the candle. Ask your little one to color (making sure to include her name somewhere, if she is able) the white side of the paper. Use tacky glue to glue the ends of the paper to the candle. These candles were a little too large for the paper to wrap all the way around, which is why there is a strip of ribbon covering that blank spot. Let it dry.
You have a gift finished and ready to give. Good for you!
Labels:
children's art,
holidays
Saturday, July 2, 2011
Felted Playmat and Duck
My friend's son just turned two. Ana helped me to make his gift. We wet-felted in a large ziplock bag, like we did for her teacher's gift. But, this time, Ana created a farm scene. Her farm ended up having a pond, so we felt that a duck should be available to swim in it. I needle-felted a simple one, using white and orange roving. I also needle-felted some flowers (vegetables?) to be grown on the farm.
This is the gift we created:
**Fair warning: Dogs like wool. Well, they specifically like to destroy anything lovely you've made with it. So, be sure to keep any wool toys put away and out of your dog's reach! I had two students lose wool gifts to their dogs mouths this year. It's sad, so beware!
This is the gift we created:
**Fair warning: Dogs like wool. Well, they specifically like to destroy anything lovely you've made with it. So, be sure to keep any wool toys put away and out of your dog's reach! I had two students lose wool gifts to their dogs mouths this year. It's sad, so beware!
Labels:
children's art,
waldorf
Saturday, June 18, 2011
Teacher Gift--Story Apron Tutorial
School ended last week. I am still decompressing a bit, with a few reports left to write, but I did manage to pull off some pretty sweet gifts for A's teacher and teacher's assistant. We all worked together to make the gift for her teacher, which I think made it extra-special. We began the gift of a home made story apron by wet-felting wool. This was a great outdoor project, as it tends to get water everywhere, particularly when a five-year-old is heavily involved.
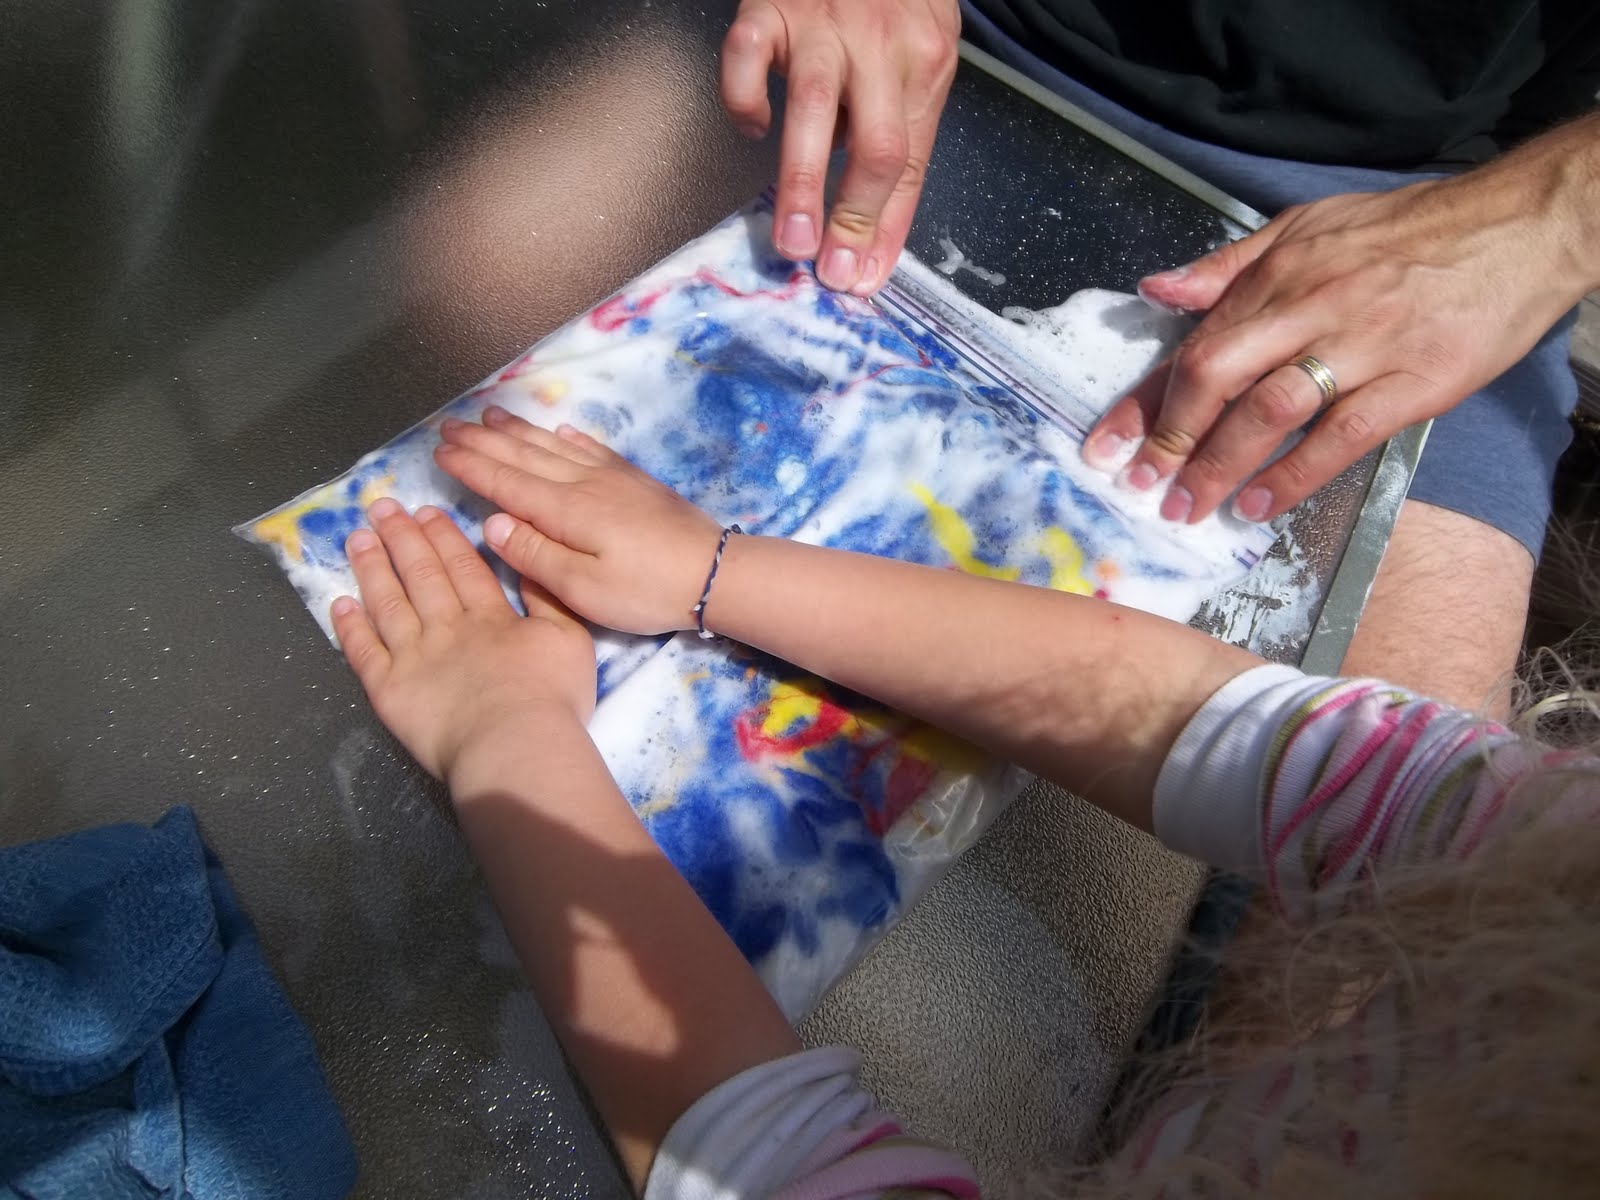
We started with a piece of wool batting that would fit into a large ziplock bag (this can certainly be done on a small scale as well, in a smaller bag), and covered it with whisps of colored roving (the thinner, the better, I have found). Then, we carefully put it into the plastic bag, added some hot water (as hot as little hands can stand) and a squirt of dishsoap, and sealed the bag, letting as much air escape as possible. Then, squish the bag as much as you can stand! It takes quite a bit of work to get the wool to felt.
After the wool has felted (open the bag to check and see that the wool is all "stuck" together before you pull it out), take it out of the bag and place it in a tub of cold water. It is important that it is cold, as this will "shock" the wool and further felt the fibers together.
This step also gets the suds out...
After your piece is thoroughly rinsed, you may wish to wring out excess water. I use this bamboo placemat that I found in the "as is" area of Ikea.
There were a few wool stragglers that I felted into the piece with a needle after it was dry.
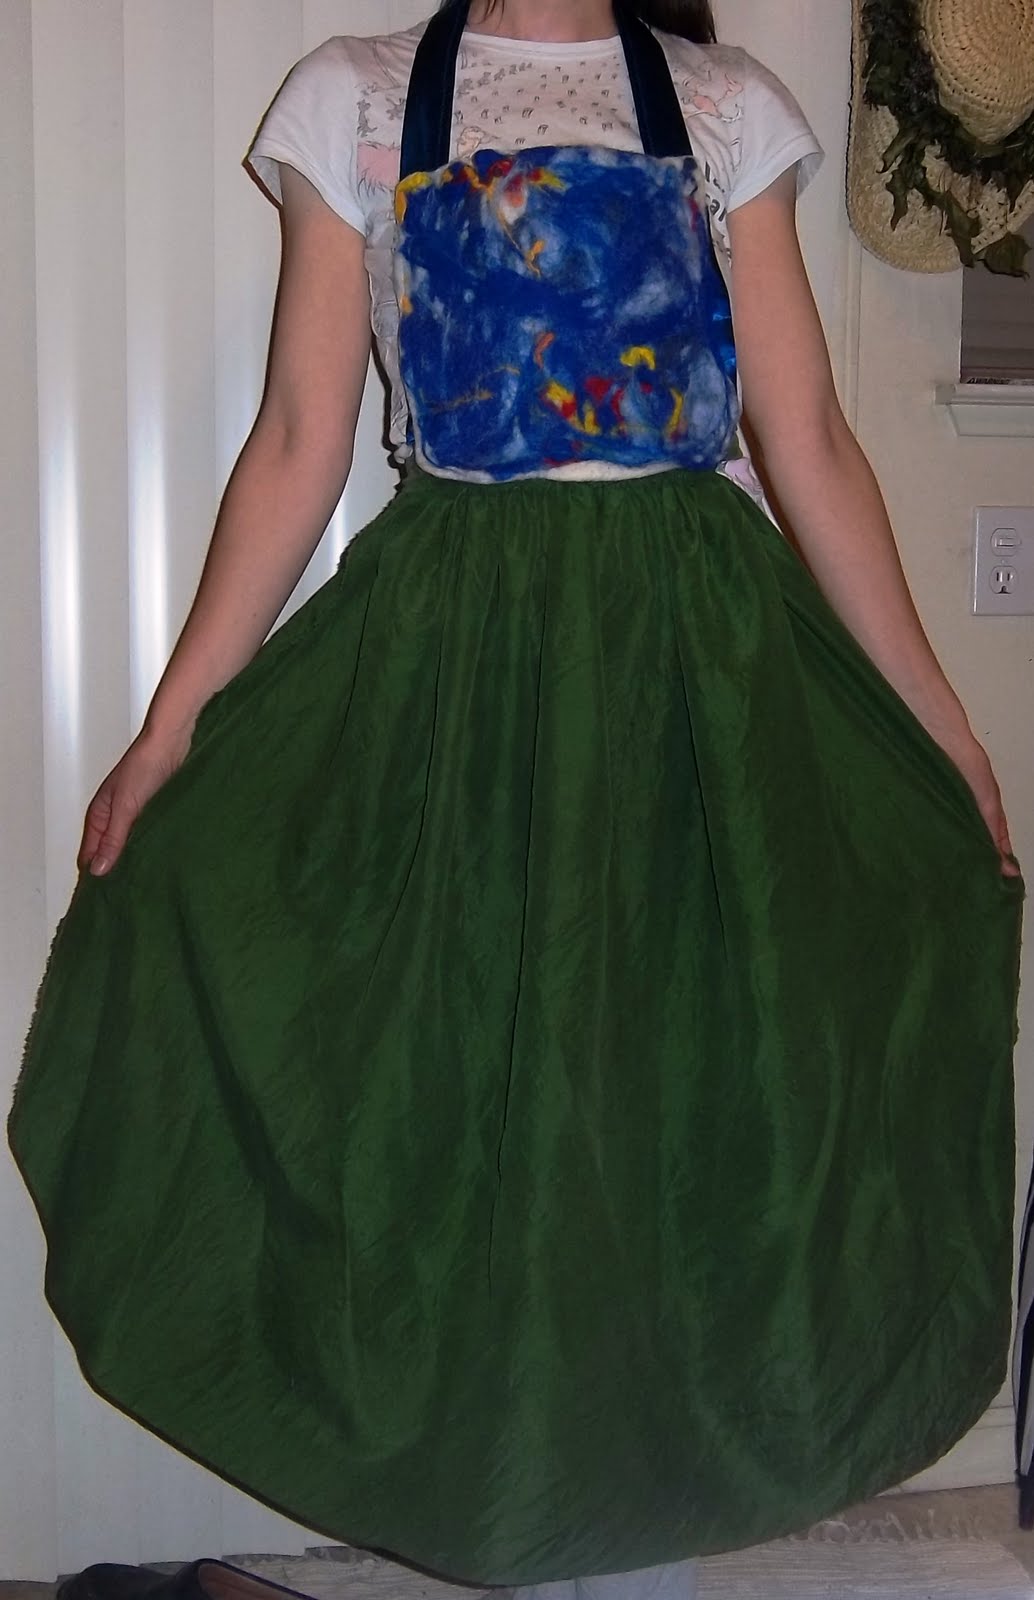
We used the felted piece for the bib part of the story apron. I bought some lovely green silk to use as the dress of the apron, as I had the idea of the bib being the sky and the skirt being the grass when her teacher was sitting to tell stories. I had leftover blue satin from another project that I used for the neck strap. Stitched them all together, and...
A story apron gift is complete.
We started with a piece of wool batting that would fit into a large ziplock bag (this can certainly be done on a small scale as well, in a smaller bag), and covered it with whisps of colored roving (the thinner, the better, I have found). Then, we carefully put it into the plastic bag, added some hot water (as hot as little hands can stand) and a squirt of dishsoap, and sealed the bag, letting as much air escape as possible. Then, squish the bag as much as you can stand! It takes quite a bit of work to get the wool to felt.
After the wool has felted (open the bag to check and see that the wool is all "stuck" together before you pull it out), take it out of the bag and place it in a tub of cold water. It is important that it is cold, as this will "shock" the wool and further felt the fibers together.
This step also gets the suds out...
After your piece is thoroughly rinsed, you may wish to wring out excess water. I use this bamboo placemat that I found in the "as is" area of Ikea.
There were a few wool stragglers that I felted into the piece with a needle after it was dry.
We used the felted piece for the bib part of the story apron. I bought some lovely green silk to use as the dress of the apron, as I had the idea of the bib being the sky and the skirt being the grass when her teacher was sitting to tell stories. I had leftover blue satin from another project that I used for the neck strap. Stitched them all together, and...
A story apron gift is complete.
Labels:
children's art,
tutorial,
waldorf
Sunday, May 15, 2011
A Mother's Day Gift
My little lovely made me a gift at school in the same fashion I tried this craft last year. It was supposed to be a scarf, but when the "scarves" arrived to her teacher, they were much smaller than anticipated (hankie size). Still, my neck is small enough that I managed to wear the gift as intended and please my little girl (though, she did give me permission to "blow my snot in it and stick it in my pocket").
I also wanted to show you one of the first cherries that has come off the tree we planted last year--yum! Not enough to do more than munching this year, but I'm hoping to have some cherry canning on my "to do" list next summer. Pitting them doesn't sound too fun though...
Back to the topic of scarves for a moment, I gave one away last year during Sew Mama Sew's Giveaway Day. It's coming up again, really soon, and I am wishing to join in the fun again. What to give away? Any suggestions, based on what I've made in the past?... Requests?... Hopefully, this week won't whisk me away and I forget the Friday deadline. Let's see...
I also wanted to show you one of the first cherries that has come off the tree we planted last year--yum! Not enough to do more than munching this year, but I'm hoping to have some cherry canning on my "to do" list next summer. Pitting them doesn't sound too fun though...
Back to the topic of scarves for a moment, I gave one away last year during Sew Mama Sew's Giveaway Day. It's coming up again, really soon, and I am wishing to join in the fun again. What to give away? Any suggestions, based on what I've made in the past?... Requests?... Hopefully, this week won't whisk me away and I forget the Friday deadline. Let's see...
Labels:
children's art,
holidays,
mama TAVE
Saturday, April 16, 2011
Wool Eggs... Hatched!
Oh, my! The egg started cracking about a week ago. And, then...
Cheep! Cheep! This chicky was joyfully discovered after he hatched and has been out of his egg and traveling in pockets, so his face is a little smooshed right now, but still so cute. He lives on our nature table.
Labels:
children's art,
holidays,
random craftiness,
waldorf
Tuesday, April 5, 2011
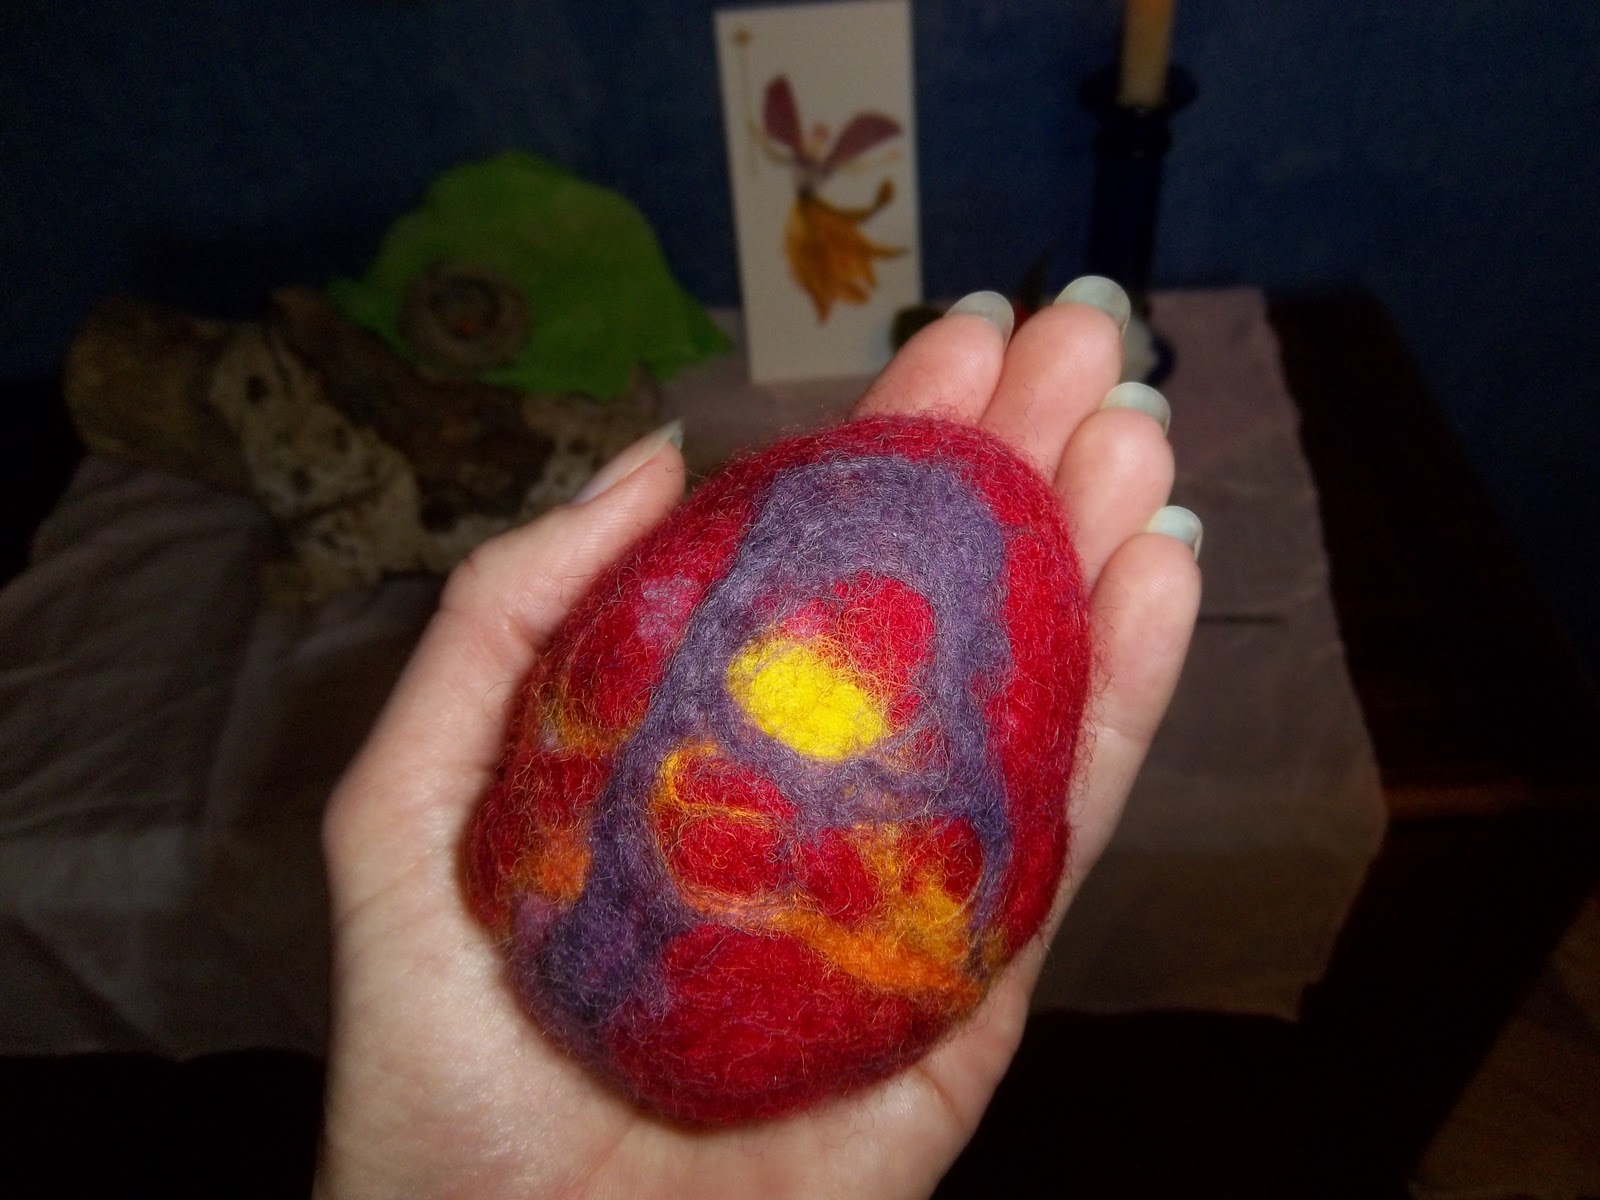
Wool Eggs
We are making these in my classroom right now, and I wanted Anastasia to have the opportunity to make one as well. This is a nice, warm activity--good for the senses with its use of natural fibers.
Don't know how to wet-felt? Just ask, and I will do my best to explain here. The supplies and procedure are quite simple.
They are cute just like this, but you can modify them a bit... Check back in a week or so to see what this one has morphed into!
Don't know how to wet-felt? Just ask, and I will do my best to explain here. The supplies and procedure are quite simple.
They are cute just like this, but you can modify them a bit... Check back in a week or so to see what this one has morphed into!
Labels:
children's art,
holidays,
waldorf
Sunday, August 1, 2010
Is your kid too much of an artist? (Link up, please!)
I don't really mean it like that. I love art. I love that my kid loves art. But... she produces a lot of art at school.... A LOT. And, I am her mother, so how can I possibly recycle ANY of it, let alone MOST of it?
While V & Co. was helping me clean out my craft room, I realized there were quite a bit of my kiddo's school creations in there.
What is a mother to do? Obviously, I can't keep it all.
I would love to hear your ideas of how to keep a select few in an ORGANIZED manner, that is also easy to add to (or make again, as the case may be) as we continue through the schoolyear.
Seriously, folks. If you have a post on your blog that relates to storing/sharing your kiddo's artwork, will you please share that specific blog post URL(s) here? Or, if you've been inspired by a post on another blog, will you leave a comment with that blog's URL or ask that blogger to link up? I will write up a nice post about the blog(s) that inspire me! Thanks in advance for your help.
*This is my first linky widget, so please give me a moment to figure it out, if it's not working...
While V & Co. was helping me clean out my craft room, I realized there were quite a bit of my kiddo's school creations in there.
What is a mother to do? Obviously, I can't keep it all.
I would love to hear your ideas of how to keep a select few in an ORGANIZED manner, that is also easy to add to (or make again, as the case may be) as we continue through the schoolyear.
Seriously, folks. If you have a post on your blog that relates to storing/sharing your kiddo's artwork, will you please share that specific blog post URL(s) here? Or, if you've been inspired by a post on another blog, will you leave a comment with that blog's URL or ask that blogger to link up? I will write up a nice post about the blog(s) that inspire me! Thanks in advance for your help.
*This is my first linky widget, so please give me a moment to figure it out, if it's not working...
Thursday, April 22, 2010
Earth Day May Day Baskets
Being the me that I am, I had to figure out something to do with my students to celebrate Earth Day today. My lesson plans for the day quickly evaporated, as one thing led to another (as is often the case). But, I still managed to pull this one off. The project is not finished, as we did not have a long enough chunk of time, but we got to talk about the good Earthy stuff on Earth Day, so I consider it a success in progress.
We started making baskets for May Day.
I've been collecting used strawberry baskets as I use/find them. And, we have a nice cubby filled with scratch paper. So, we reused those two items to begin our May Day basket-making, and had a brief lesson in reuse, as well as doorbell ditching etiquitte. It took me back to 20ish years ago when my sister and I would make May Day baskets, fill them with Spring flowery goodness, ring the bell of an unsuspecting well-loved neighbor, set the basket on the porch, and run... Good stuff.
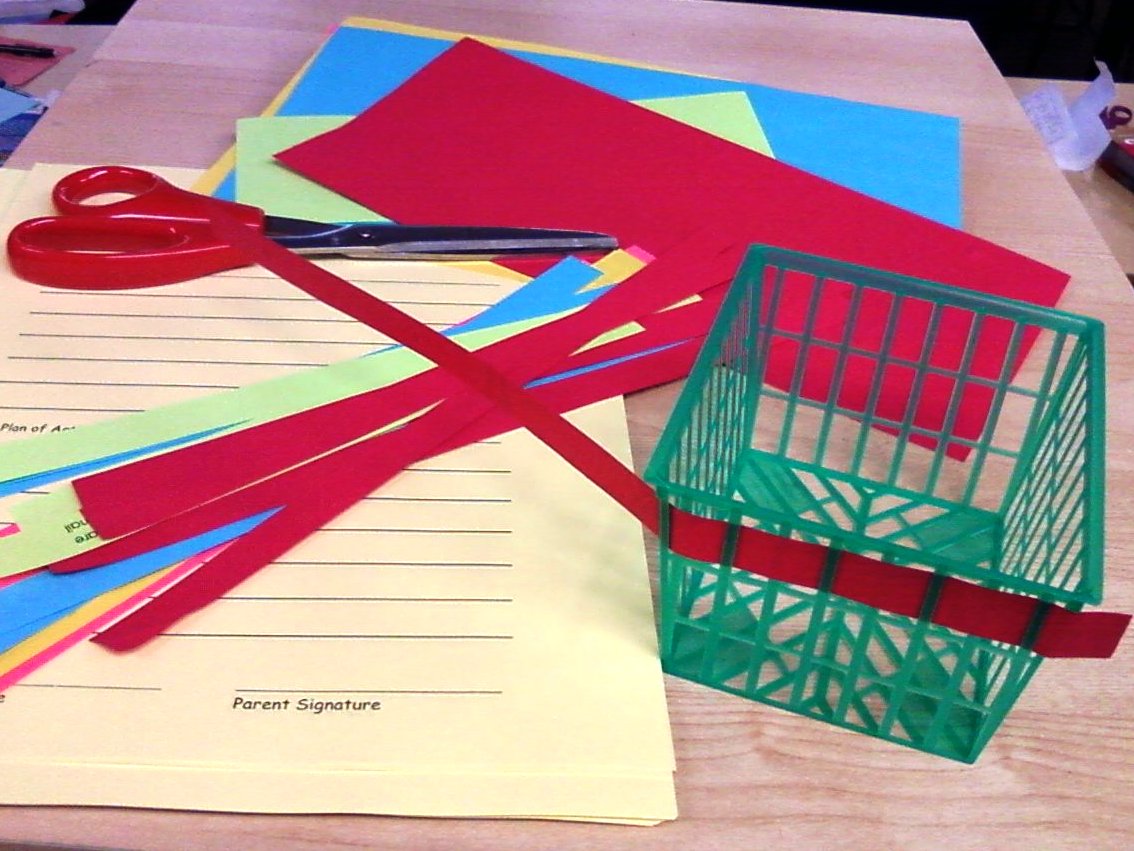
And, you can do it with your kiddos, too. You just need colored paper that has already lived a good, used life (remember, we're talking reuse here), scissors, and a strawberry basket.
Cut strips of paper that will fit through the spaces on the sides of the basket, and weave them in and out.
We started making baskets for May Day.
I've been collecting used strawberry baskets as I use/find them. And, we have a nice cubby filled with scratch paper. So, we reused those two items to begin our May Day basket-making, and had a brief lesson in reuse, as well as doorbell ditching etiquitte. It took me back to 20ish years ago when my sister and I would make May Day baskets, fill them with Spring flowery goodness, ring the bell of an unsuspecting well-loved neighbor, set the basket on the porch, and run... Good stuff.
And, you can do it with your kiddos, too. You just need colored paper that has already lived a good, used life (remember, we're talking reuse here), scissors, and a strawberry basket.
Cut strips of paper that will fit through the spaces on the sides of the basket, and weave them in and out.
Keep doing this until your basket is completely decorated. I do not have any pictures to show you for this. Not sure if we'll have time to tackle finishing these tomorrow. We'll see. They will be finished by next Thursday, for sure, and I will post the finished product pictures. Here's what is sitting in my classroom right now; come back on Thursday for the finished basket pics!
Sunday, March 21, 2010
Welcome, Spring!
I felt the need to welcome Spring in an "everlasting" sort of way, that everyone who visits our home can enjoy. Grandma gave me a wreath form (not grapevine, but some other sort of sticks woven together), so I used that as my starting point....
Gathered some tissue paper, Mod Podge, ribbon, and two paint brushes (so Little Munch could make a spring craft of her own--GOBS of Mod Podge were used, so it's still drying and I can't share pictures of her final product yet, but here she is in action)...
Voila! Welcome, Spring!
The butterflies are from my wedding bouquet.... I knew I would need them for something someday!!! This wreath is still missing something... I think I will add some flowers for the butterflies to enjoy.
Gathered some tissue paper, Mod Podge, ribbon, and two paint brushes (so Little Munch could make a spring craft of her own--GOBS of Mod Podge were used, so it's still drying and I can't share pictures of her final product yet, but here she is in action)...
Voila! Welcome, Spring!
The butterflies are from my wedding bouquet.... I knew I would need them for something someday!!! This wreath is still missing something... I think I will add some flowers for the butterflies to enjoy.
Labels:
children's art,
random craftiness
Tuesday, February 9, 2010
Time for some "new" crayons!
Almost one year ago, I started this blog. One of my first posts showcased my first attempt at recycling crayon nubs and turning them into new crayons. It sure was a fun experiment, and many children reaped the rewards. I wanted to try it again this year for Valentine's day gifts for my students, as well as for Anastasia to share with her classmates. The heart-shaped mold makes them perfect Valentine's Day gifts.
I find that it's easiest, when using the silicone mold, to push the crayons out while the mold is still just a touch warm. Getting the crayons out without breaking is the hardest part for me! At least one crayon in every batch cracks in half while I'm trying to get it to break free from the mold.
Because it's so frustrating to lose one of a small number of crayons after waiting 20 minutes for them to "cook", and then another 20 or so for them to cool..., I want to try a new "recipe" that I discovered in one of my Christmas gifts, Make it Fast, Cook it Slow
. This requires a metal mold. So, when I find one at a thrift store or garage sale (keeping true to my commitment to not buy anything new!), I will update this post and let you know how it works out!
I find that it's easiest, when using the silicone mold, to push the crayons out while the mold is still just a touch warm. Getting the crayons out without breaking is the hardest part for me! At least one crayon in every batch cracks in half while I'm trying to get it to break free from the mold.
Because it's so frustrating to lose one of a small number of crayons after waiting 20 minutes for them to "cook", and then another 20 or so for them to cool..., I want to try a new "recipe" that I discovered in one of my Christmas gifts, Make it Fast, Cook it Slow
Labels:
children's art,
crayons,
holidays
Sunday, April 5, 2009
Easter Eggs, the way Mother Nature intended

I've been experimenting with natural dyes for Easter Eggs. The biggest difference between these dyes and the artificial ones that come in a box is that the natural dyes require quite a bit more time, several minutes, to get a good color. Plus, I was using brown eggs, so that made it even more of a challenge to notice a color change! These are the three colors we had the most success with:
Pinkish--I started by soaking beet skins in a couple tablespoons of vinegar overnight. The next morning, I took out the skins and added about 1/2 cup of water. This was uber-convenient, because I was making beets and greens for dinner last night while prepping for coloring eggs today!
This was the most vibrant dye.
**I tried throwing some beet skins in with the eggs when I hard-boiled them. We used both brown and white eggs, and it didn't do a thing.
Orange/Yellow--I love cooking with turmeric because of it's beautiful color. It is also beautiful on egg shells! Same method as for coffee grounds: boil 1 tablespoon of ground tumeric in 2 cups for about 15 minutes. Let water cool completely and add a couple tablespoons of vinegar to each 3/4 cup of liquid.
Blueish--Boil about 1 cup of frozen blueberries in 2 cups water for 15 minutes. Let water cool completely and add a couple tablespoons of vinegar to each 3/4 cup of liquid.
In the pictures, the eggs that are super-dark were hard boiled with a couple scoops of coffee in the water. Anastasia didn't want to do a coffee dye dip, so we didn't. But, those eggs that were hard-boiled with coffee and then dyed in either the beet or blueberry dye are a really neat earthy color.If I had spinach, I would've attempted green eggs. But, I only wanted to use what I already had in the house, so no green eggs this year. Check back in 2010 for more colors!
Labels:
children's art,
holidays
Monday, March 2, 2009
Anastasia's Art Table
This was a Christmas gift from Jason and me. I must confess that Jason did most of the hard work. The idea for the crayon holder was mine, but he spiffed it up into a multi-level holder that I had not envisioned. He also devised a way to have plastic tubs slide out from under the table, so that paper and paints have a place to live out of view. Nice.
I got the inspiration for this gift from shiso mama--another mother who crafts to keep her sanity. You should check out her blog to see her version of the art table. Our table parts also came from Ikea, but we chose a smaller red table top to match the living room. I liked the idea of curved edges, as Anastasia tends to run without looking. This makes the paper rolling a bit more difficult, but she doesn't mind asking us for help with that.

Linked up at:
I got the inspiration for this gift from shiso mama--another mother who crafts to keep her sanity. You should check out her blog to see her version of the art table. Our table parts also came from Ikea, but we chose a smaller red table top to match the living room. I liked the idea of curved edges, as Anastasia tends to run without looking. This makes the paper rolling a bit more difficult, but she doesn't mind asking us for help with that.


Linked up at:
Labels:
children's art,
crayons,
inspiration
Subscribe to:
Posts (Atom)